Thursday, July 27, 2006

Indian Eggplant Revisited


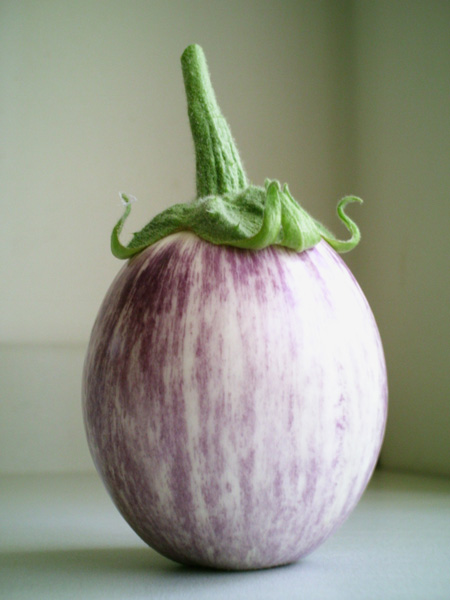
Here is my prize Indian eggplant that I photographed as it was rapidly growing, a few weeks ago. I harvested it a little late, because it was just too %*$&ing hot to cook. So it matured on the vine beyond when I would ideally have cut it. The nice thing about that is that now I have a few seeds for the next generation. According to this website, "Overmature fruits are spongy and seedy and may be bitter." They recommend such over ripe eggplants be discarded. Bah! Eggplant lovers, such as myself, are not detered by such foolish advice.

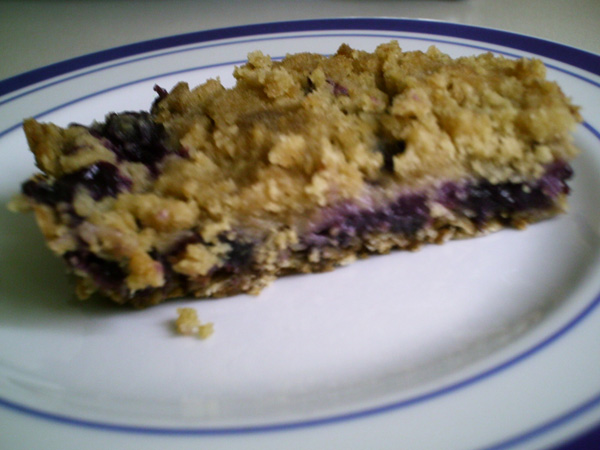
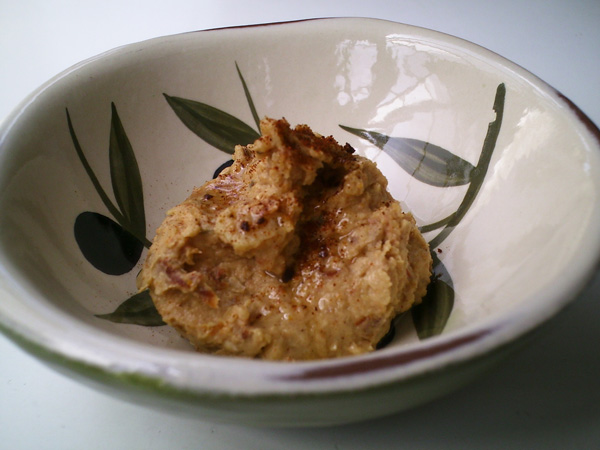
I turned it into my favorite food for this time of year -- an Indian sweet & sour eggplant dish. The recipe comes with a recommendation for serving with sourdough bread, which is fine and good, but I decided to turn it into a pizza with sourdough crust. I don't have any photos to share, because we ate after it got dark (and cool).

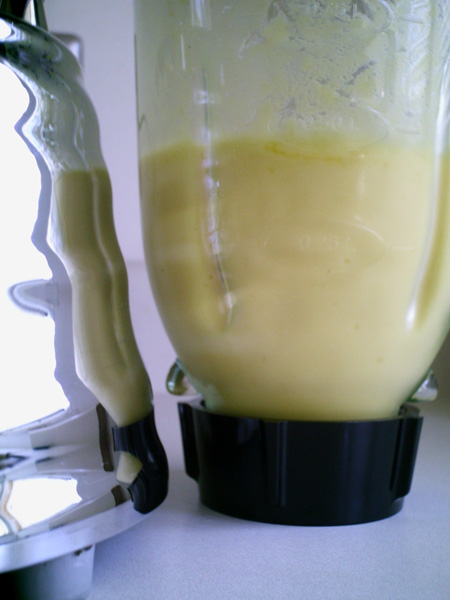
Now I'm a huge sourdough bread lover, but I've always been intimidated by the idea of keeping sourdough starter on hand. I have heard that the stuff is rather aromatic. Plus I'm afraid I would forget about it and find it overtaken by a floating wafer-like colony of suede-textured, green mold. If you have ever accidentally grown that particular type of mold you would know the horror of which I speak. I had a run-in with that stuff when I worked in a lab and had carelessly left a vial soaking in the sink over winter break. I don't care to form a second impression.

But there is hope for microflora-phobics! You can make pseudo sourdough and it is frightfully easy. Just substitute yogurt for some of the water in your bread dough. I wasn't sure how much, so I went with half water/half yogurt. I believe it is a good idea to let the yeast grow before you mix the yogurt in, so that the friendly yogurt bacteria don't out-compete the yeast. Also make sure the yogurt is at room temperature or warmer, so you don't shock the yeast when you add it.

In the past I served this sweet & sour eggplant dish with sourdough crostini, but I think I prefer the softness of the pizza crust.

Friday, July 21, 2006

Sea Salt or White Gold?


In ancient times this wouldn't just look like a pile of tiny diamonds, but this would also be closer in value to a pile of diamonds (in West Africa it was nearly equivalent to gold). Salt in those days was harder to come by and appreciated for its value in maintaining vitality and preserving foods. In fact the word 'salary' comes from the latin word 'salarium', which means a payment made in salt. Roman soldiers were typically paid in salt. You can read more about the history of salt here.

Sodium and chloride are essential for life. Without salt our bodies become weak and susceptible to heat stroke and infections. Deficiency typically is not a problem in developed nations, where processed foods are over-fortified with salt. Even if you quit eating processed foods, so long as you eat meat or other animal products you will probably get sufficient sodium. People at risk of sodium deficiency are those who rely on a plant-based diet, while simultaneously keeping to a low-sodium intake, because plants do not contain sufficient sources of sodium. Plant-based foods are great sources of potassium, however, which is another important electrolyte. The typical citizen of developed nations is more at risk for potassium deficiency, because excess sodium intake, as well as excess sugar intake, can interfere with potassium equilibrium. The human body requires about 3 times as much potassium as sodium.

Any imbalance in your stores of sodium, potassium, or chloride -- the three major electrolytes -- becomes apparent during spells of hot weather. Deficiency symptoms are more likely to surface under these extreme conditions. The most easily recognized symptom is propensity for dehydration despite adequate fluid intake. Without adequate electrolyte intake, your body cannot properly absorb water, so it will pass straight through you without rehydrating you. After hours of not hyrdrating properly in hot conditions, your body will enter a state of heat exhaustion, characterized by a headache, nausea, and possibly vomitting. If you suspect you are suffering from an inability to hydrate properly, your quickest remedy is to drink water mixed with Emergen C, drink a sports drink, or make a quick homemade oral rehydration solution (as recommended by the World Health Organization):

In a pint glass add:
2 ½ teaspoons sugar
1/3 teaspoon salt (sea salt is best)
1 ¾ cup water
squeeze of lime or lemon

Stir well to dissolve.

If you suspect you are more deficient in potassium, Emergen C will be your better option because it has twice as much potassium as sodium, although it only contains about 6% of your daily recommened intake of potassium. Otherwise look for potassium salt. Morton makes a potassium chloride salt and I'm sure there are other brands out there as well.

Thursday, July 20, 2006

Lily

Shine On You Crazy Salt Crystals


It's hard for me to get very excited about baking bread in the summer. While I enjoy eating bread all year round, I don't enjoy being anywhere near a hot oven (or stove for that matter) in a warm house. So I was mystified at my eagerness to try this bread recipe.

I was hoping to make something similar to the rosemary sea salt bread that a baking company out of Seattle, called the Essential Baking Company, has made for years. I'm particularly fond of the coarse sea salt they sprinkle on top. I found a recipe that doesn't yield the same results, but does make for a very light and tasty bread. I was impressed that it was quick to throw together and also did not need to sit in a hot oven for too long.

Rosemary Sea Salt Bread

1 Tablespoon dry yeast
1 Tablespoon sugar
1 cup warm water (105-115° F)
2 cups white whole wheat flour
1 teaspoon sea salt, fine textured
2-3 Tablespoons rosemary, chopped
2-3 Tablespoon extra virgin olive oil
coarse sea salt

To a medium sized bowl, add yeast, sugar and warm water. Let sit 5 minutes, and become bubbly. Add 1 cup of flour and mix well. Add remaining flour, salt, rosemary, 1 Tablespoon extra virgin olive oil, and enough additional flour to make a smooth dough that isn’t too sticky to handle. Knead for about 10 minutes, or until additional flour becomes difficult to incorporate. Form dough into a ball.

In a large bowl, add a small pool of oil. Dip top of dough in oil and then set upside right in the bottom of the bowl. Coat the dough evenly with the oil. Place a damp towel over the bowl and set in a warm place for an hour, or until dough doubles in size.

Once doubled, punch down and let sit another 5-10 minutes. Meanwhile lightly grease a baking pan or heat your baking stone. Divide dough in half, forming a rounded loaf out of each half. Pat more oil on the top and then sprinkle with coarse sea salt to taste. Bake in a 450° F oven for 20 to 25 minutes, until lightly browned.

Saturday, July 15, 2006

Something Old & Something New


Cupcakes are currently experiencing a renaissance. The last time cupcakes were this trendy was in the 1950s. I have an old tupperware container that was my grandmother's that I always thought had an inconvenient shape, until I realized that 9 cupcakes tuck in there perfectly. Is that a mandate that three should be eaten immediately? In any case, my generation seems to be relishing everything retro.

When I tried to look up a few cupcake recipes in my "Better Homes & Gardens" cookbook from the mid 1990's, I was surprised that it only lists three main flavors -- vanilla, yellow, and chocolate. We are so beyond that now -- gourmet cupcake recipes abound on the internet.

Cupcakes originated in the 19th century, when cakes were often times baked in tea cups for speedier baking, because larger cakes took an eternity to cook on a hearth. But even more intriguing, cup cake recipes were the first recipes written with proportions in cups instead of weights. Click here for more cupcake history or here if you are truly cupcake obsessed.

This is a recipe recently posted at Save Your Fork . . . There's Pie, for Lime Ginger Cupcakes with Coconut. I just came upon these silicone cupcake molds. I have to admit they were too cute to leave on the store shelf or even let sit in my cupboard for 24 hours. I decided to do a little experiment, as they recommend that you spray oil to coat the insides "for best results." I like to push limits, you see. I also wondered how well they would work without a muffin tin holding them up. They passed the no-muffin-tin test with flying colors. They did fine only supported by a cookie sheet. When I popped the cupcakes out of their ungreased molds they stuck about as much as you would expect with paper liners.

My only concern left was whether it would effect my health, but apparently silicone rubber is the only non-stick bake-ware material that is also inert. Apparently this has to do with the compactness of the polymer on the molecular level which renders it resistant to interactions with other molecules.

Friday, July 14, 2006

When Life Gives You Thai Basil . . .


. . . make Thai pizza!

Holy basil! My siam queen basil really took off this year, even while my italian basil sulked. Before I knew it flowers were threatening to bud. Time for a hair cut and dinner of a thai persuasion.

While Thai green curry is one of my favorite dishes of all time, it does take some preparation and a few exotic ingredients (galangala, for instance). My other favorite use for Thai basil is Thai pizza. Due to nature's abundance, I skewed my recipe a bit and was delighted with the result. The peanut sauce I used is the same one on the California Pizza Kitchen's Thai Chicken Pizza. I wouldn't exactly call it health food, but in my opinion it is the best recipe for peanut sauce that I have yet encountered.

Spicy Peanut Sauce
1/2 cup peanut butter
1/2 cup hoisin sauce
1 Tablespoon honey
2 teaspoons red wine vinegar
2 teaspoons fresh ginger, minced
2 Tablespoons raosted sesame oil
2 teaspooons soy sauce
1 teaspoon Vietnamese chili sauce
1 Tablespoon oyster sauce
2 Tablespoons water

Add all your ingredients into a sauce pan and heat until smooth.

Thai Pizza
pizza dough for one pizza, shaped into crust form (or pre-prepared crust)
1/4 cup spicy peanut sauce
1 cup mozzarella cheese, shredded
2 scallions, slivered diagonally
1 carrot, shredded
2-4 Tablespoons roasted peanuts, minced
1/4 cup (at least) thai basil, loosely packed

Spread sauce evenly on pizza dough, avoiding the crust around the edge. Then spread the cheese, scallions, carrots and peanuts evenly over the sauce. Bake at 450º F for about 15 to 20 minutes. Meanwhile chiffonade your basil. Once the pizza crust is golden and the cheese melted, remove your pizza from the oven and sprinkle the top with your basil leaves.

There is nothing quite like fresh home-grown Thai basil. I have never eatten so much fresh Thai basil in one sitting before, and I was impressed that it imparted a very noticable cinnamon taste to the pizza. The Thai basil you can buy in the grocery store is not the same.

Thursday, July 13, 2006

Aubergine Dreams


This was one of my indian eggplant plants about 3-4 weeks ago. Here is one now:

I really cannot believe how quickly things grow.

Wednesday, July 12, 2006

Something Borrowed & Something Blue


As much of a scone addicted fool as I am, I do occasionally grow weary of my vast library of scone recipes. When I saw this recipe for Blueberry Breakfast Bars at Farmgirl Fare, I knew it would become my new favorite way to hoard blueberries. The recipe makes a large panful (9" x 13"), and over half of that I have frozen in classic foodie obsessive-compulsive manner.

These are quite good, although rich enough to make me feel a twinge of guilt eating them for breakfast. Consequently I would recommend the following changes for anyone else having a hard time justifying them for breakfast:

  1. substitute organic white whole wheat flour for the all purpose flour
  2. substitute turbinado sugar for both the white and brown sugar
  3. maybe throw a few more oats into the mix, possibly in the topping
  4. you might be able to get away with using a little less butter

Tangent -- while I was buying my blueberries I overheard the produce manager mention to his colleague that the berries in the store are cheaper for him to purchase than his own labor would be to pick from his own garden. That launched me into a long muse about under-valued agricultural workers and global salary rates. Will the same hold true in the future? But above and beyond all that, the berries in his backyard are most assuredly more flavorful and healthful, so really there is no comparison.

Hummus 3 Ways


Hummus is so easy to make that there really is no excuse for not making your own. I have to remind myself of this from time to time. When you make it yourself you avoid added ingredients, such as preservatives, while maximizing the freshness and healthiness of the ingredients. Further, you can flavor it to your own preferences. This recipe is proportioned around using one can of beans, so you needn't worry about the added step of measuring out the beans. If you cook your own beans, use 1 1/2 cups.

Hummus

1 can garbanzo beans (chick peas)
4 Tablespoons tahini
3 Tablespoons lemon juice
1 1/2 Tablespoons extra virgin olive oil
3 cloves garlic
1/2 teaspoon paprika
1/3 teaspoon ground coriander
1/4 teaspoon cumin
pinch cayenne pepper

plus one of the following options:
1 roasted bell pepper, chopped
1/2 cup sun dried tomatoes, sliced
3/4 cup kalamata olives, slices

Mince the garlic finely first. Even though you will be processing the hummus, it is important to let the minced garlic stand for 10 minutes before incorporating it into the recipe, in order to maximize its health-giving properties. Drain the liquid from the beans into a bowl and set aside. Add all of the ingredients (except the bean liquid) into a food processor and process until smooth. If the texture is too thick, add the liquid from your beans until you achieve a desirable texture.

Sunday, July 09, 2006

Wild Service


This is one of those instances where my cheap digital camera proves inadequate.

In any case, occasionally I get it in my mind that it's a good thing to be educated about edible wild plants. In case I find myself in the backwoods without a supply of food, it would be nice to have a good idea of what my options are.

Here we have a Serviceberry. I had pretty high hopes for this little berry. If you read about them from various sources on the internet, you would be lead to believe they not only look like blueberries, but also taste like them. Native Americans referred to them as "sweet" berries. Nutritionally, they are high in vitamin C, iron, and copper. That is all fine and good, but when I tasted this little fruit, while there very well may have been underlying notes of blueberry, I couldn't get past the bitter taste of leather. It tasted like it had sat too long in someone's saddle bag. Now I know some people don't mind that flavor and even prefer the "leathery" flavors in certain wines, but it really isn't my idea of a "sweet" blueberry imitator. And then there was the single seed inside that was about the size of a fennel seed, which is quite large for such an innocuous-looking berry.

Saturday, July 08, 2006

Mango Still Life with Blender (x4)


I'm sorry, am I playing with my food? If you are interested in the recipe or the nutritional benefits of mango lassis, please visit Fit Fare.

Friday, July 07, 2006

5 Star Salmon


Yes, I know, but I did say "mostly" vegetarian and fish is really the best source of certain omega 6 fats, so I really don't feel guilty posting this.

From what I can gather, this recipe originated at a restaurant called The Ark Restaurant & Bakery, on the Long Beach peninsula of the Washington coast (close to the Oregon border). If you want relatively easy 5 star home-cooking, this recipe is for you! The best part about fine dining at home is that you can actually get away with licking your plate afterward. Trust me, you will feel the urge to do so with this sauce.

Scotch Salmon

2, 7 oz salmon fillets (buy wild)
4 Tablespoons butter, clarified
salt & pepper to taste
1 teaspoon garlic, minced
1 teaspoon shallot, minced
1/2 teaspoon dijon mustard
1/2 teaspoon brown sugar
2 Tablespoon raspberry vinegar
1/2 cup scotch
1/2 cup orange juice
1/2 cup heavy cream
6 Tablespoons Drambuie
Crème fraîche

Dust each salmon fillet lightly with flour. In a pan large enough for both fillets, heat the butter. Add your salmon and brown slightly on one side. Add salt and pepper to taste and turn fillet over. Add garlic, shallot, mustard and brown sugar. Cook for a few seconds. Add raspberry vinegar. The second side of your salmon should be slightly brown at this point. With the fillets still in the pan, deglaze them with the scotch. Add orange juice. Move the pan in a circular motion to blend ingredients. Remove salmon and let your sauce reduce until it begins to thicken. Place salmon back in the pan and finish with cream and Drambuie. Top your fillets with the sauce from the pan, and with crème fraîche.

Note: I whipped my crème fraîche for this, without adding anything like sugar or vanilla to it.

Beware that you buy your salmon from a trusted source. As I usually don't buy fish, I don't have an ongoing relationship with the fishy guy behind the counter. I asked specifically for wild salmon and he told me that that is what he gave me, but the label he printed out with the price on it did not support his claim. I won't be buying fish from him again.

Thursday, July 06, 2006

Daytrip 2006.01