Friday, June 30, 2006

Getting Cultured


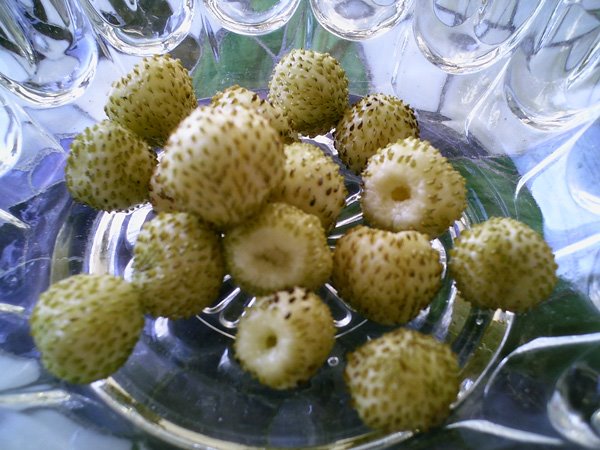
As you watch the store shelves burgeon with the bounty of fresh summer fruits -- plump blueberries, succulent strawberries, and soft, juicy peaches -- it becomes nearly impossible to avoid bringing a plethora of these treasure home, regardless of considering how or when you will eat them.

While a bowl of fresh fruit is certainly satisfying, it seems human nature to want to combine fruit with cream. Typical choices, of course, are ice cream, yogurt, whipped cream, or just cream. While that is fine and good, there is a further way to delight in the fruit and cream combo, and one which is probably more appetizing to anyone who may be lactose intolerant: crème fraîche.

Crème fraîche is a cultured cream product that you can easily make at home. You can whip it up like you would whipping cream and enjoy it on fruit, use it on other desserts that call for whipped cream (bearing in mind that it has a more sour flavor than whipped cream), or use it as a sour cream substitute.

Not only do the beneficial bacteria in cultured milk products help break down lactose, but they also appear to support immune function while they simultaneously out-compete harmful bacteria and yeast.

Crème Fraîche
2 cups of pasteurized, but not ultra pasteurized heavy cream
1 to 2 Tablespoons of cultured buttermilk

Add the buttermilk to the cream in a saucepan and slowly heat, while stirring, to 85° F. Pour into a sterile glass jar. Let sit at room temperature, loosely covered, for 8-12 hours. As the buttermilk cultures grow in the cream you will notice it thickening. After it has incubated for the given period of time, refrigerate for about 24 hours before using.

Whipping Crème Fraîche
Proceed as you would when whipping cream -- add vanilla, sugar to taste, and possibly lemon or lime zest plus maybe a touch of citrus juice.

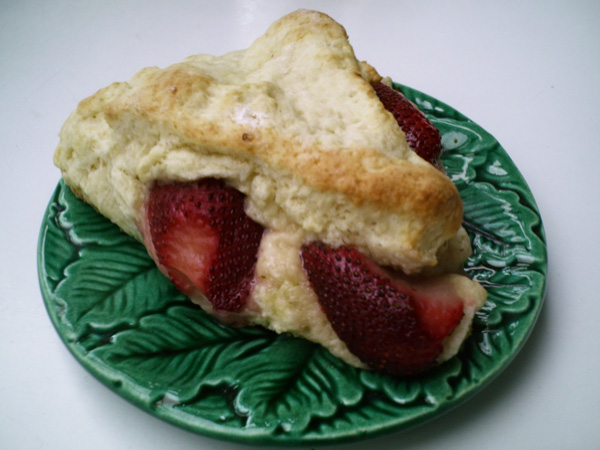
We recently had whipped crème fraîche, with lime zest, on a fruit salad composed of organic strawberries, pineapple, and papaya. I highly recommend it.

Wednesday, June 28, 2006

Strawberry Fields Forgotten


This spring I rescued a strawberry plant that had been forgotten in a neglected garden bed. I selectively shoveled out some very healthy grass that had reached the saturation point we know as turf. To my delight the strawberry plant flushed out with large glossy new leaves and a small fortune of dainty flowers. But just as fruit began to set, a construction project was slated adjacent to my resurrected strawberry plant. Rather than risk death by trampling, I opted for transplantation. After many weepy days, turgor pressure finally returned. But something didn't appear right -- the multitude of fruit were not ripening. Or so it seemed. It took me a while to realize this, in fact, was a yellow-fruiting strawberry plant.

If you've never tasted a yellow strawberry, you are missing out. They are a form of alpine strawberry. Alpine strawberries have small, but tastier fruits than traditional strawberries. The volume of fruit produced by alpine strawberry plants can never compare with the more productive traditional strawberry plants, so you are unlikely to find alpine strawberries in a grocery store. Yellow alpine strawberries taste like pineapple, and lack the acidity of regular strawberries. Riper fruits taste almost like bananas, which I personally do not prefer, but I have a cat who loves banana flavor and she loves these strawberries.

Friday, June 09, 2006

Mid-Summer's Sandwich


When the weather gets warm, my desire for sandwiches declines. One particularly hot summer day, when I didn't think I'd be interested in eating lunch at all, I came across this combination. My appetite perked right up.

Mid-Summer's Sandwich:
2 slices of good (preferably crusty) bread
cream cheese to taste
cucumber, sliced
mango chutney to taste
sprouts (preferably spicy ones, like broccoli)

I suspect I don't need to tell you how to assemble it.

I make my own mango chutney and add various spices, including a generous amount of curry powder. If you use a mango chutney without discernable amounts of curry powder, I would highly recommend mixing some curry powder into the cream cheese.

I happened to mention this sandwich to the owner of our favorite cafe, and wouldn't you know it suddenly appeared on their menu?

Friday, June 02, 2006

Strawberry Scones


Thanks to the sage advice of Farm Girl plus a happy cooking accident, I decided to try my hands at making strawberry scones. If you reference a previous post here at Jaded, you will see that I (as well as certain other nefarious sorts) have been coveting the strawberry scones at a favorite local cafe. Although it briefly crossed my mind that I might attempt this recipe at home, I apparently needed a little nudge in that direction. (Thank you Farm Girl for planting that seed).

The other impetous came when I woke up one morning, groggy and bitter about kitchen re-modeling, only to find myself fresh out of butter. Scones were on the menu and a trip to the store was not a pleasant prospect. So my mind shifted into substitution mode, as I inventoried the refrigerator. Ah ha! Cream cheese, that'll probably work, and OK there is just over 2 Tablespoons of butter left. Even safer. So I set to making scones with half butter and half cream cheese. And wouldn't you know, the batter came out a lovely texture. Softer and easier to handle. And when the scones came out of the oven they were moister and fluffier. My only gripe was my poor choice of flavor combinations. That's when I realized the ideal cream cheese scone would be of the strawberry variety.

So mid-week, after work, left to my own devices in a quiet kitchen, I threw together some strawberry scones. Here's how I did it:

2 cups flour
heaping ¼ cup sugar
2 tsp baking powder
¼ tsp baking soda
¼ tsp salt
2 ½ Tbsp butter
2 ½ Tbsp cream cheese
1 egg, beaten
½ cup milk (I use 2%)

1 cup frozen strawberries (ideally these would be pre-sliced)

Combine flour through salt and stir to combine. Add butter and cream cheese and cut with a pastry blender until you achieve coarse crumbs, no larger than peas. Mix milk with egg and add all at once. Stir to combine. Flour a countertop and your hands. With your hands mix your batter together until it holds in a ball. Knead a few times on the counter, then shape into a disc shape (about 6 to 8 inches wide and 3/4 inch thick in the center, thinner at the edges). With a floured knife, cut off the top of the dough. If the cutting gets difficult, re-flour your knife. Remove top section and set aside. Arrange strawberries evenly on top of the bottom section of dough. If strawberries are not particularly ripe -- with a whitish interior -- sprinkle with about 1/2 Tablespoon of sugar and a bit of salt. Place top section of dough on strawberries and attempt to fuse the outer edges with the bottom section. Cut with a sharp knife into 12 pie-shaped segments. Place individually, without touching, on a cookie sheet, after brushing excess flour off bottoms. Bake at 375 F for 10 to 12 minutes.

Here's what I think: They taste wonderful. Next time I will freeze strawberries specifically for this purpose -- I will wash AND DRY them and slice them to about 1/4 inch thick or so. My frozen strawberries had been haphazardly frozen in large chunks and were bejeweled with ice crystals. They added too much moisture, which interfered with the baking of the surrounding dough, leaving it somewhat raw in spots.

If you crave more scone ideas, I just found a website with a huge list of variations.

Break in Regularly Scheduled Programming


Support our National Parks! Learn more at the National Parks Conservation Association.

Thursday, June 01, 2006

Spilling the Cocoa Beans


Recently, Cate, at Sweetnicks, asked reader's to divulge their favorite guilty foodie pleasure. I had to claim that mine were these brownies. My original intent was to keep this recipe with me to the grave, but as I've already given this recipe away to insistent friends, I figure it's fair game for food blogging.

JADED BROWNIES

1/4 tsp salt
3/4 cup flour
1/4 cup cocoa
1 cup brown sugar
1 cup white sugar
4 eggs
1/2 cup unsalted butter
4 oz unsweetened chocolate
2 Tbsp espresso or strong coffee
1 cup chocolate chips
1 cup coconut flakes

Grease and flour a 9 x 13 inch pan.
In small bowl, combine salt, flour, cocoa.
In medium bowl, beat sugar and eggs until light.
Meanwhile, melt butter and chocolate slowly.
Drizzle melted chocolate into egg mixture, while stirring. Add espresso. Fold in flour mixture, then coconut, and then chocolate chips.
Pour into pan and bake at 350° for 35-45 minutes, until toothpick inserted in middle comes out clean.

Perma Construction


I love to cook. Therefore I desire a functional and pleasing environment in which to perfect my culinary skills. Thereby I am restricted from using the kitchen on weekends.

I am fortunate to have a spouse who is skilled in construction, who is willing to ensure that the kitchen is left temporarily functional between weekend work sessions, and who so far hasn't ditched everything all together. See, I am no happy camper after being shut-out of the kitchen, only to return to an always refreshed cleaning adventure and, by far the worst part, nothing to eat.

Our home is a pre-WWII bungalow. My grandmother, much to my chagrin, refers to it as looking like a doll's house. (I roll my eyes). The existing kitchen is small and square (about 10' x 10'). When you consider that a corner of the kitchen is functionally little more than a thoroughfare between other rooms, this shrinks down to about 5' x 10' of usable space. We chose not to change the original footprint of the house, so it has been a challenge to squeeze a modern refrigerator, stove, and sink all within these confines and still have room to move around. The refrigerator in particular has always been a dilema. The previous owners left theirs partially blocking the doorway that leads into the kitchen from the living room. After going over it graphically many times, we've found that there really is no other placement option. I looked for a smaller fridge, but there isn't much of a market for small fridges. I got the smallest one I could find locally. It still impedes access to the kitchen. So part of our re-model involves moving the doorway to accomodate the refrigerator. To mimic the other architectural features of our house, we decided to put an arch at the top of the doorway. You can see this feature in my photo above (taken from the living room into the kitchen). Yes, the refrigerator has also been banished from the kitchen for the duration of the re-model.

And, you know, it really is amazing how nice it is to have a doorway through which you can move unimpeded (particularly when you are carrying heavy and bulky objects, such as laundry baskets). I think it will all be worthwhile in the long run.